
Your Guide to an Amazon Deactivate Seller Account

Receiving that dreaded email from Amazon saying your seller account has been deactivated can feel like the world is crashing down around your business. One minute you’re selling, the next, everything grinds to a halt.
This guide is here to walk you through the two major situations sellers face: proactively closing your own account, and reactively fighting a sudden, forced deactivation from Amazon. Please note, this article is for informational purposes only and is not legal advice. Reading it does not create an attorney-client relationship.
Understanding Your Account Deactivation Path
When it comes to your Amazon seller account, you’re usually on one of two very different tracks: a planned, voluntary closure or an unexpected, involuntary deactivation. Knowing which path you’re on is absolutely critical. The steps you need to take, the financial fallout, and your chances of selling on Amazon in the future all hinge on this distinction.
Getting hit with a sudden deactivation notice from Amazon is jarring, to say the least. It requires an immediate, calculated response to have any hope of getting your selling privileges back.
On the other hand, a voluntary closure is a process you control from start to finish. This is the route sellers take when they’re pivoting their business, retiring, or just moving on from the platform. While it’s far less stressful, it still requires careful planning. You’ll need to handle final orders, deal with any FBA inventory, and square up your finances to make a clean break.
The Two Roads of Account Status
Whether your account status changes by choice or by force dictates every move you make next. The infographic below lays out the fundamental split between a closure you initiate yourself and a deactivation Amazon enforces on you.
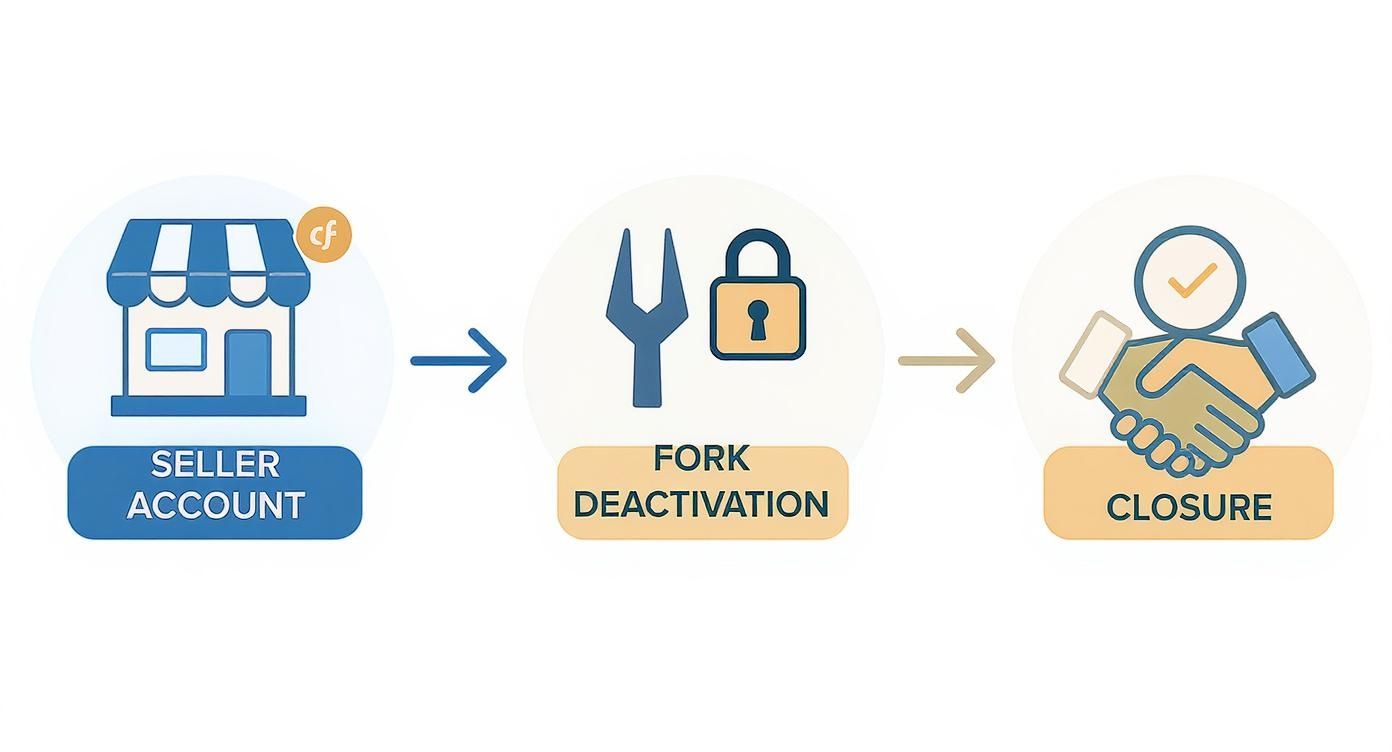
As you can see, both journeys start with an active seller account but end in dramatically different places. One path is defined by control, the other by a scramble for resolution.
Key Takeaway: An involuntary deactivation is a massive disruption to your business. It freezes your listings, locks up your inventory, and puts a hold on your money. Unlike a voluntary closure where you call the shots, an Amazon-forced suspension immediately puts you on the defensive, forcing you to prove you deserve to be back on the platform.
The initial shock of seeing “Your Amazon.com selling privileges have been removed” in your inbox is overwhelming. The consequences are immediate and severe:
- Frozen Funds: Amazon will hold your money for at least 90 days. This is to cover any potential A-to-z claims or customer refunds that might come through.
- Vanishing Listings: All your product listings are instantly deactivated. They become invisible to shoppers, and you can’t make a single sale.
- Stranded FBA Inventory: Any inventory you have stored in Amazon’s fulfillment centers is essentially held hostage. You won’t be able to create removal orders to get it back until you’ve addressed the suspension.
To help you quickly grasp the core differences, here’s a quick comparison.
Voluntary Closure vs Involuntary Deactivation Quick Comparison
| Aspect | Voluntary Closure (Seller-Initiated) | Involuntary Deactivation (Amazon-Initiated) |
|---|---|---|
| Control | You control the timeline and process. | Amazon dictates the terms and timeline. |
| Funds | Funds are disbursed on the normal payment schedule after the final sale. | Funds are frozen for a minimum of 90 days, sometimes longer. |
| Inventory | You can sell through or remove FBA inventory before closing. | FBA inventory is stranded until the account is either reinstated or permanently closed. |
| Future Selling | You can potentially open a new account in the future (with permission). | You are permanently banned unless you successfully appeal the deactivation. |
| Stress Level | Low. It’s a planned business decision. | High. It’s an unexpected crisis that threatens your business. |
Understanding these distinctions is the first step toward building a recovery plan or, alternatively, executing a smooth exit. This guide provides a clear roadmap to help you navigate your specific situation, offering actionable advice for both scenarios.
How to Voluntarily Close Your Amazon Seller Account
Deciding to close your Amazon seller account isn’t like flipping a switch; it’s a major business decision. Unlike a surprise deactivation from Amazon, a voluntary closure puts you in the driver’s seat. But getting a clean exit means being methodical to avoid any financial or logistical nightmares down the road. You can’t just walk away—every loose end needs to be tied up for a smooth shutdown.
This is more than just clicking a button. You’ve got to manage final orders, deal with any leftover inventory, zero out your balance, and tick all of Amazon’s pre-closure boxes. Let’s walk through the essential checklist to get it done right.

The Pre-Closure Checklist
Before Amazon will even let you request to close your account, you have to complete several crucial tasks. Think of this as your pre-flight check. Missing a single step will stop the deactivation cold and could leave you with lingering fees or unresolved problems.
First up, you have to fulfill every single outstanding order. This might sound obvious, but it’s vital to make sure every last customer gets their product. One unfulfilled order can quickly turn into an A-to-z Guarantee claim, which throws a major wrench in the closure process.
Next, you need to wait 90 days after your very last sale before you can even think about initiating the closure. This waiting period is a hard-and-fast rule from Amazon, designed to cover the A-to-z claim window. During these three months, customers can still file claims, and Amazon requires your account to be active to handle them. It’s a common frustration for sellers ready to move on, but it’s a core part of the process.
Financial and Inventory Housekeeping
Getting your money and products sorted is a top priority. Your account balance must be exactly zero before Amazon gives the green light. This means you’ll have to wait for your final disbursement, which won’t happen until after that 90-day claim period is over and all refunds or chargebacks have been completely settled.
At the same time, you have to resolve every customer return. Any pending return requests must be fully processed and refunded.
For many sellers, the biggest hurdle is dealing with Fulfillment by Amazon (FBA) inventory. Any products just sitting in Amazon’s warehouses will keep racking up storage fees, even if your listings are inactive. You have two ways to handle this:
- Create a Removal Order: This tells Amazon to ship all your remaining inventory back to you. This is the smart move if you plan to sell the products on other channels.
- Create a Disposal Order: If the inventory isn’t worth getting back, you can have Amazon get rid of it for a fee. This is often cheaper and quicker than a removal.
Important Reminder: Don’t ignore your FBA inventory. If you let it sit, stranded inventory can rack up hundreds or even thousands of dollars in long-term storage fees. That debt will absolutely prevent you from closing your account.
Finalizing Your Account Status
Once the orders are fulfilled and the finances are squared away, a few last administrative steps remain. You need to resolve all cases you’ve opened with Selling Partner Support. An open case signals to Amazon that something is still unresolved, and they will block your closure request.
Finally, dive into your Performance Notifications in Seller Central. You must go through and resolve every single notification. This means addressing any policy warnings or performance alerts, no matter how minor they seem. You need a completely clean slate.
After you’ve meticulously worked through this entire checklist, you can finally put in the formal request to close your account. You can usually find this by navigating to Settings > Account Info > Close Account. Amazon will ask you to confirm that you’ve completed all the required steps.
Remember, closing your Amazon seller account is permanent. Once it’s gone, you lose access to everything—your order history, performance metrics, and all customer communications. For your own tax and record-keeping purposes, it’s a very good idea to download all your essential reports—like sales data, transaction reports, and tax documents—before you hit that final closure button. A clean, deliberate shutdown is the only way to protect yourself from future liabilities and move on with total peace of mind.
Decoding the Reasons for Your Account Deactivation
Getting that dreaded email from Amazon telling you your seller account is deactivated can send a shockwave through your business. It’s disorienting and deeply frustrating. The reasons are often buried in dense policy jargon, but they almost always boil down to a handful of triggers Amazon’s algorithms are constantly watching.
Figuring out the why is your first and most critical step toward building an effective appeal.
The Account Health Rating Nosedive
More often than not, the culprit behind a deactivation is a drop in your Account Health Rating (AHR). This score is the central nervous system of your Amazon business, tracking how well you stick to their policies and performance targets. Think of it as a credit score for your selling privileges—a high score means you’re a trusted partner, while a low one screams risk.
Every new seller begins with an AHR of 200. With flawless performance, you can grow that score up to a maximum of 1,000. But if it starts to fall, you’re heading for trouble.
Amazon deactivates accounts when the AHR drops below that critical 200-point threshold. If your score slips into the 100-199 range, your account gets slapped with an ‘At Risk’ warning. At that point, a deactivation notice could land in your inbox any day. This composite score is affected by everything from customer service metrics to IP compliance, and the consequences are severe, often including suppressed listings and a hold on your funds for at least 90 days.
Real-World Scenario: A seller specializing in phone accessories let a few minor ‘Product Authenticity Customer Complaints’ slide over several weeks. Each complaint chipped away at their AHR. Individually, they didn’t seem like a big deal, but their combined effect pushed the AHR below 200, triggering an automatic deactivation that completely blindsided them.
Common Violations That Trigger an Instant Shutdown
Beyond the slow burn of a declining AHR, certain serious violations can get your account shut down almost immediately. Amazon’s number one priority is protecting its customers and its own brand, so it moves fast when it sees specific red flags.
Here are some of the most common tripwires:
- Intellectual Property (IP) Complaints: This is a huge one. When a brand owner reports you for trademark, copyright, or patent infringement, Amazon takes it very seriously. This could be as simple as using a brand’s logo in your product images without permission or selling a product that looks a little too similar to a patented design.
- Selling Inauthentic or Counterfeit Products: This is the cardinal sin on Amazon. Just one credible counterfeit complaint can be enough for an immediate deactivation. It’s absolutely essential to maintain a clean supply chain with verifiable invoices. If you’re facing this, it’s worth understanding an Amazon seller’s worst nightmare the counterfeit complaint.
- Violating Amazon’s Code of Conduct: This is a catch-all category for shady behavior. It includes things like trying to manipulate customer reviews, attempting to divert shoppers away from Amazon, or setting up multiple seller accounts to get around a previous suspension.
The Danger of Linked Accounts
Another surprisingly common reason for deactivation is the dreaded “linked account” suspension. Amazon’s system is incredibly good at connecting accounts that share data points—things like bank accounts, physical addresses, IP addresses, and even the devices you use to log in.
If you, a business partner, or even someone in your household had a seller account that got suspended in the past, opening a new one is a ticking time bomb. Amazon will eventually find the connection. Once it does, the new account is almost always deactivated for being related to a previously banned account. This happens even if the new account has perfect metrics.
Amazon’s logic is simple: you can’t just wipe the slate clean and start over to escape a prior suspension. You have to fix the problems with the original account first. This policy catches countless sellers off guard, leading to a notoriously complex and difficult appeal process.
Your First Moves After a Deactivation Notice
Getting that email from Amazon telling you your seller account has been deactivated is a gut punch. The first instinct is pure panic, but the moves you make in the next few hours are absolutely critical. Now is not the time to fire off a hasty, emotional response. It’s time to take a deep breath, get strategic, and start gathering evidence.
Your first job is to dissect that deactivation notice. Don’t just skim it—read every single word to understand exactly which policy Amazon says you’ve violated. While the email is your starting point, the real details live inside Seller Central.
Head straight to your Performance Notifications and then check your Account Health Dashboard. This is where you’ll find the specific ASINs that triggered the problem, the exact complaint type (like intellectual property or product authenticity), and any previous warnings you might have overlooked. Pinpointing the root cause Amazon has identified is the absolute foundation of your appeal.
Do Not Open a New Account
I can’t stress this enough: whatever you do, do not try to open a new seller account. It’s a common mistake made in a moment of panic, but it’s a fast track to a permanent, lifetime ban from the platform.
Amazon’s systems are incredibly sophisticated at sniffing out linked accounts. They look at everything—bank information, IP addresses, physical locations, you name it. Trying to get around a suspension this way is a major violation of Amazon’s seller code of conduct. If they catch you, which they almost certainly will, they won’t just shut down the new account; they’ll kill any chance you had of getting the original one back. Your only way forward is to fix the issues with your current, deactivated account. For a deeper dive on what to do next, check out this a comprehensive guide to navigating an Amazon account suspension and recovery.
Dealing with the Immediate Financial Fallout
A deactivation doesn’t just halt your sales; it freezes your cash flow cold. Amazon will immediately place a hold on all the funds in your seller account for at least 90 days. They do this to cover any potential A-to-z claims, chargebacks, or customer refunds that might come through. You need to brace your business for this sudden stop in revenue.
At the same time, all of your FBA inventory is now stranded. You can’t create removal orders to get your products back while the account is down. Your inventory will sit in Amazon’s fulfillment centers, racking up storage fees, until your account is either reinstated or permanently closed.
Important Note: This article is for informational purposes only and is not to be construed as legal advice. No attorney client relationship exists based on the review of this this article and none of the information in this article is legal advice.
Start Assembling Your Evidence Immediately
Once you have a crystal-clear understanding of the violation, it’s time to gather every document that can back up your appeal. Don’t even think about writing your Plan of Action yet. First, you need to build your arsenal of proof.
Start pulling together the following:
- Supplier Invoices: These need to be from the last 365 days and must clearly show your supplier’s name and contact info. Crucially, the purchase quantities must make sense when compared to your sales volume for the items in question.
- Letters of Authorization (LOA): If you’re dealing with an IP rights complaint, an LOA from the brand owner is your silver bullet.
- Customer Communications: Dig up any emails or buyer-seller messages related to the flagged ASINs. Sometimes the context here can be very helpful.
- Internal Records: Gather any documentation you have on your quality control checks, shipping procedures, or internal notes that demonstrate how you run your business.
Most deactivations aren’t from a single slip-up; they’re often the result of repeated policy violations. The triggers can be anything from selling restricted products to intellectual property infringements. One seller we worked with had $50,000 in inventory and $5,000 in funds frozen over a single compliance issue, which just shows how serious the financial risk is.
Having all this evidence organized and ready to go is non-negotiable. You can learn more about how to tackle a tough reinstatement in our guide on dealing with a suspended Amazon account. Your ability to present a calm, fact-based appeal backed by solid documentation is your best and only shot at getting back online.
How to Write a Plan of Action That Gets Results

When that dreaded “Amazon deactivate seller account” email lands in your inbox, your Plan of Action (POA) instantly becomes the most critical document for your business. Think of it less like a letter and more like a formal, structured case for getting your account back. To write one that actually works, you need the right mindset: take complete ownership, be crystal clear, and focus on fixing your systems, not making excuses.
A winning POA isn’t about pleading or trying to shift blame. Amazon’s reviewers spend just a few minutes on each appeal and are trained to look for a very specific three-part structure. Nailing this format is your best shot at cutting through the noise and getting reinstated.
Part One: The Root Cause
The first, and frankly most important, part of your POA is digging deep to find the true root cause of the violation. This means going way beyond just stating what happened. For example, if your suspension was for “inauthentic” complaints, the root cause is not “a customer made a false claim.”
A real root cause sounds more like this: “Our quality control process failed to identify damaged packaging from our supplier, which led customers to reasonably question the product’s authenticity.” This shows Amazon you’ve done a serious investigation and understand exactly where your own processes failed.
Critical Insight: Never, ever blame the customer or Amazon in your POA. You have to take full responsibility, even if you feel the complaint was unfair. This is non-negotiable. Amazon needs to see that you’ve found a weakness within your control and have a plan to fix it for good.
Part Two: Immediate Corrective Actions
After you’ve diagnosed the problem, you need to spell out the immediate actions you have already taken to fix it. This section is all about showing you’re proactive. It’s not about what you will do; it’s about what you’ve already done before you even hit “submit” on the appeal.
These actions must directly address the root cause you just identified.
- For a product quality issue: “We have created a removal order and disposed of all remaining inventory for ASIN [XYZ] from FBA fulfillment centers.”
- For an IP complaint: “We have permanently deleted the infringing ASIN from our catalog and have manually reviewed all other listings to ensure full compliance.”
- For customer service problems: “We have personally contacted every affected customer, issued a full refund, and apologized for their negative experience.”
Listing concrete, completed actions tells the reviewer you’re serious about making things right, effective immediately. Vague promises will get your appeal tossed aside.
Part Three: Long-Term Preventive Measures
This final section is where you convince Amazon this problem will never, ever happen again. It requires you to think bigger than just fixing a single ASIN. You need to implement new, durable systems across your entire operation to prove you’re a reliable seller who learns from mistakes.
Strong preventive measures look like this:
- Supplier Vetting: “We have implemented a new multi-point supplier verification process, which includes mandatory factory audits and requires official letters of authorization for all new brands.”
- Quality Control: “A new two-person quality assurance check is now mandatory for all inbound shipments to inspect for packaging integrity and product accuracy before being sent to FBA.”
- Team Training: “Our entire team has completed mandatory training on Amazon’s intellectual property policies, and we will now hold quarterly refresher courses to stay current.”
The appeal process can be incredibly frustrating. You have to submit a separate POA for each specific violation, and it’s not uncommon for Amazon to reject them with vague or even conflicting feedback. Some sellers report submitting as many as ten different POAs for a single issue before finally getting reinstated.
Your POA needs to be professional, factual, and perfectly structured. For a more guided approach, you can check out resources like our Amazon Plan of Action template. Ultimately, your goal is to make it incredibly easy for the Amazon employee to check the boxes and approve your reinstatement.
To help you organize your thoughts, here’s a breakdown of what each section of your POA should accomplish.
Plan of Action (POA) Core Components
| POA Section | Objective | Key Elements to Include |
|---|---|---|
| Root Cause | To demonstrate a deep understanding of why the problem occurred, focusing on internal process failures. | Specific breakdown of the system or workflow that failed. Acknowledge ownership without making excuses. |
| Immediate Actions | To show you have already taken decisive steps to resolve the immediate issue and mitigate customer harm. | List of completed actions (e.g., removed inventory, refunded customers, deleted listings). Use past tense. |
| Preventive Measures | To prove you have implemented new, long-term systems to ensure the problem will never happen again. | Details on new workflows, training programs, supplier vetting, and quality control procedures. Use future tense. |
Crafting a POA that hits all these points clearly and concisely is your best strategy for a swift and successful reinstatement.
Disclaimer: The information provided in this article is for informational purposes only and does not constitute legal advice. No attorney-client relationship is created by your review of this article, and none of the content should be considered a substitute for professional legal counsel.
Frequently Asked Questions About Account Deactivation

Dealing with an account deactivation is incredibly stressful, and it’s natural to have a lot of questions. We’ve compiled direct, clear answers to the things sellers ask us most often during this tough time. Let’s cut through the confusion and get you some practical information.
How Long Will Amazon Hold My Money?
One of the first and most painful blows of a deactivation is the immediate freeze on your funds. When this happens, Amazon will hold your entire account balance for a minimum of 90 days.
This isn’t arbitrary; it’s a standard procedure. This 90-day window gives Amazon a buffer to handle any potential A-to-z Guarantee claims, customer refunds, or chargebacks that might pop up after your account goes dark.
Key Takeaway: You absolutely must prepare your business for a cash flow disruption of at least three months. In more severe cases involving things like fraud, be aware that this hold can be extended indefinitely while Amazon’s investigation is ongoing.
What Should I Do With My FBA Inventory?
If you’re an FBA seller, your inventory becomes “stranded” the moment your account is deactivated. Your products are essentially locked up in Amazon’s fulfillment centers. You can’t sell them, and you can’t create removal orders to get them back.
Everything remains in limbo until your account is either reinstated or permanently closed.
There are really only two paths forward for your FBA stock:
- If You’re Reinstated: The good news is that once your account is active again, your inventory becomes available for sale immediately. You can pick up right where you left off.
- If You’re Permanently Closed: Should your appeals fail, Amazon will generally provide a 30-day window for you to create a removal or disposal order for your remaining inventory. If you miss this deadline, Amazon may dispose of it for you.
And don’t forget, you’ll still be racking up storage fees the entire time your account is suspended.
Can I Open a New Seller Account After a Deactivation?
Let me be crystal clear: absolutely not. Trying to open a new account to sidestep a suspension is one of the biggest mistakes you can make. It’s a direct violation of Amazon’s seller code of conduct and is the fastest way to get a permanent, lifetime ban.
Amazon has incredibly sophisticated systems for linking accounts. They track everything from bank accounts and business addresses to IP addresses and even the devices you use. Once they connect a new account to a previously suspended one, it gets shut down almost instantly.
Your only real option is to work through the official appeal process for your original account.
Is an Account Deactivation Permanent?
It doesn’t have to be, but you must treat it as a serious threat. The deactivation notice is your chance to appeal the decision. Whether or not you get back online depends entirely on how persuasive and well-crafted your Plan of Action (POA) is.
Many sellers successfully navigate the appeals process and get reinstated. However, if your POA is weak and gets rejected repeatedly, or if the violation was severe (like selling counterfeit goods), the deactivation can become permanent.
Once you’ve exhausted your appeals, you’ve lost your selling privileges for good. At that stage, your focus has to shift to recovering any withheld funds and getting your inventory back.
Navigating the minefield of an Amazon suspension can feel impossible. If you’re hitting a wall trying to get your money or inventory released after a deactivation, the team at LA Law Group, APLC has the legal and business expertise to fight for you. To discuss the specifics of your case, visit us at https://www.bizlawpro.com for a direct consultation.
Attorney Advertising. This article is general information, not legal advice, and does not create an attorney-client relationship. Prior results do not guarantee a similar outcome.