
Amazon Seller Central Verification: A Step-by-Step Guide

You’ve just opened Seller Central to check a shipment, and instead you’re staring at a verification notice with a deadline. Your listings may still be live, your inventory is sitting in a fulfillment center, and the message asks for documents you thought you’d already supplied. That gap, between what you entered months ago and what Amazon can now match on paper, is where most Amazon Seller Central verification cases stall. Treat it as a consistency problem first, not an upload task.
Which Verification Amazon Is Asking You to Complete
That notice in your inbox is asking for one of three things: documents, a face check, or a video call. Which one it is decides what you prepare, who needs to be available, and how much time you have.
Amazon doesn’t run one single check. Accounts land on five distinct paths, and sellers lose days when they answer the wrong one, uploading bank statements when Amazon wanted a live identity check, or booking a call when a corrected address file would have closed the case.
The Five Paths You Might Be On
Registration identity verification is the starting gate for new accounts. In 2025, 100% of new sellers were required to complete Amazon’s verification process before being allowed to sell, according to Amazon’s Trustworthy Shopping Experience Report. There is no partial launch while you sort paperwork later.
Business and tax validation checks the entity behind the account. Amazon compares your business license, registry extract, tax registration, or VAT records against the details you entered at registration. Country rules can add or swap documents, so a file that satisfies one marketplace may not satisfy another.
Live identity checks go further than uploads. Amazon may ask for a photo of you holding your ID, a face-and-ID check, or a video call with an associate. Clarification requests come after a review, when something you submitted was unclear, mismatched, or incomplete. The case stays open at that point. Amazon is telling you the file did not prove what it needed to prove, and a corrected resubmission can still close it.
| Verification path | When Amazon asks | Typical documents | Typical timing |
|---|---|---|---|
| Registration identity verification | New account setup | Government photo ID, proof of address dated within 180 days, bank or credit-card statement | About three business days when files are complete |
| Business and tax verification | When Amazon confirms the entity behind your account | Business license or registry extract, tax registration, VAT documents | Reviewed after submission; country rules can add requested documents |
| Live identity check (face or video) | Amazon requests an enhanced check | Original ID used at registration, face-and-ID photo or video call | Check takes a few minutes to eight minutes; review up to 72 hours; 14 days to begin |
| Clarification request | Documents unclear, mismatched or incomplete | Corrected or additional documents | Can follow review within two business days |
| Reactivation or address refresh | Address or banking change, or reactivation workflow | Utility bill dated within 90 days in some workflows | Reviewed after submission; an open clarification request extends review |
Timing That Changes Your Plan
The Amazon seller FAQ describes verification taking about three business days when submissions are complete and accurate, with a clarification request possible within two business days of review. Treat both figures as estimates, not promises.
A live check compresses things differently, and the 14-day figure in the table is the deadline sellers most often misread. It is the window to begin the check, not to finish it. The appointment itself runs only a few minutes, but review can still take up to 72 hours afterward. Reading the notice late burns preparation time you cannot recover, and a missed start window can leave your inventory stranded in a fulfillment center while the case sits unresolved.
Triage first: Name the path before you touch a scanner. Documents, face check, and video call each need different people and different originals in the room.
This article is for informational purposes only. It’s not legal advice, none of the information here should be construed as legal advice, and reading it creates no attorney-client relationship.
Start with that one triage question. Once you know which path you’re on, the right preparation becomes obvious, and you stop sending Amazon evidence it never asked for.
Documents and File Formats That Pass Review
Rejections rarely involve fraud. They involve a stale statement, a cropped corner, or a name that fails the character-for-character match, and every failed match is another stretch where your inventory and your disbursement sit in limbo. The table below is the fastest pre-upload check you can run.
| Document | Validity rule | Formats and size | Common reason for rejection |
|---|---|---|---|
| Government photo ID | Valid and unexpired | PDF, PNG, JPG, JPEG, TIF, TIFF; under 50 MB in some workflows | Expired, cropped or not the ID type selected in the account |
| Proof of address (bank or credit-card statement) | Dated within 180 days | Same formats | Screenshot, older statement or name mismatch |
| Utility bill for reactivation workflows | A more recent bill than the standard rule may be required | Same formats | Bill outside the stated window or address not matching the profile |
| Business license or registry extract | Current official record | Same formats | Entity name differs from the Seller Central profile |
| Notarized translation | Accompanies the original record | Same formats | Translation missing or not linked to the original |
Date Rules Decide More Cases Than Content
Amazon’s registration guide requires a government-issued identification document and proof of residential or business address dated within the previous 180 days, such as a bank or credit-card statement. That guide also covers the phone number, email, internationally chargeable credit card, bank and routing details, business license or registration, and tax information Amazon asks for at setup.
A bank or credit-card statement is the usual proof of address because it shows your name, address, and issue date on one official page. Some reactivation workflows ask for a more recent proof of address than that standard window allows, and the exact cutoff appears in the Seller Central message or case page that requested the document. Confirm it there before you pick a bill. A statement that was valid when you downloaded it can age out while it sits in a folder waiting for you to upload it, so check the issue date first, before you scan anything.
Preparing Files Like Evidence
Accepted formats and file limits matter as much as legibility. A seller community discussion of verification uploads describes accepted formats including PDF, PNG, JPG, JPEG, TIF, or TIFF, with some workflows imposing a 50 MB ceiling and rejecting password-protected files. Work through your files in this order:
- Scan in color at full resolution: Keep the original color and avoid screenshots from a banking app.
- Inspect every edge at 100% magnification: All four corners must show, with no glare over the name, address, or date.
- Use plain filenames: Skip special characters and remove any password protection before uploading.
- Never edit the document: An altered PDF, even one cleaned up with good intentions, invites a clarification request.
Records in a language Amazon doesn’t support for that workflow may need the original plus a notarized translation, submitted together so the reviewer can link them. Sending the translation alone usually gets you nowhere.
The same matching discipline applies when Amazon later checks your supply chain paperwork, so it pays to understand what Amazon looks for when verifying invoices before a document request lands.
Build a Reconciliation Sheet Before You Upload
Write down your exact legal name, your address line by line, your entity type, your account role, and each document’s issue date. Tick every item against your Seller Central profile. Where the two disagree, the document loses, because Amazon compares what you send against what the account already says. Fix the profile field or get a corrected document now. I’d rather spend twenty minutes on that sheet than three days waiting for a clarification request I could’ve prevented.
How to Submit Your Verification Step by Step
Order matters more than speed. Sellers who upload first and reconcile later create mismatches Amazon then asks them to explain. Confirm the entity before you touch the upload button, and the rest of the submission becomes a matching exercise instead of a guessing game.
The sequence below mirrors the process Amazon expects, with the usual slip flagged at each stage.
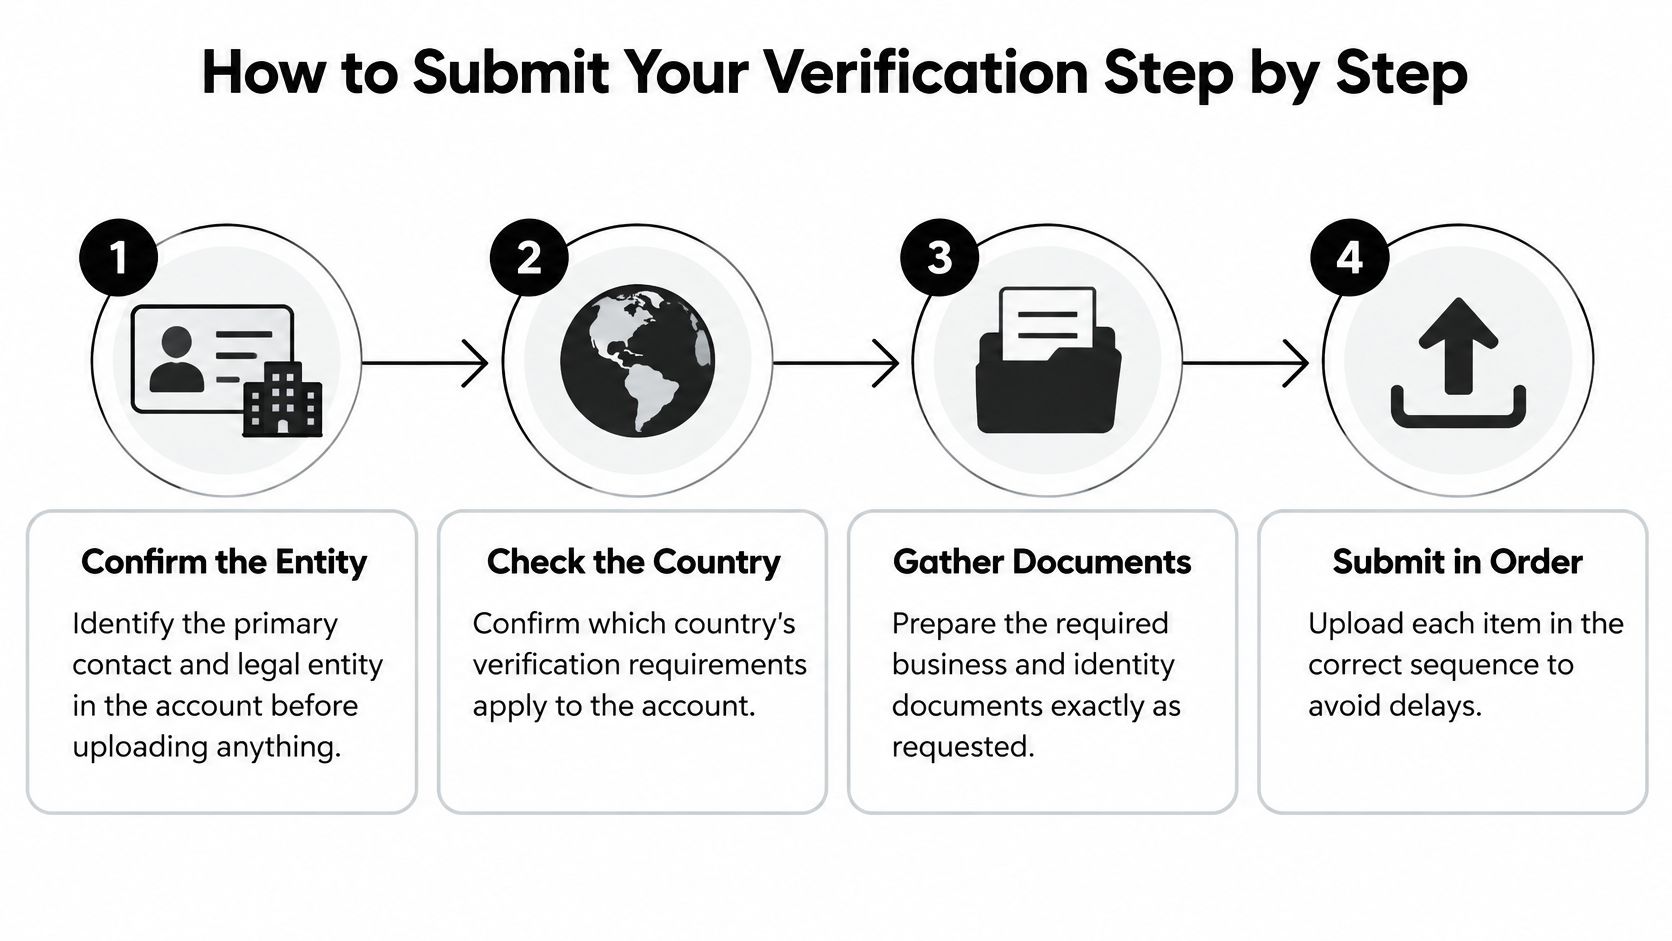
The Five Steps in Order
1. Identify the primary contact and the legal entity. Open your account details and confirm who the primary contact is and which legal entity owns the account. Then confirm which country’s rules apply, because that decides whether you need a registry extract, a VAT record, or a local tax document. The common slip is preparing documents for a different entity, such as a parent company or a newer LLC that isn’t the one on the account.
2. Enter details exactly as printed on official records. Copy names, addresses, and business details letter for letter, including transliteration and address formatting. Amazon’s review is a matching exercise, not a judgement call. A nickname, a shortened street name, or “St.” where the statement says “Street” can be enough to stall the case.
3. Upload the identity, address, and business files. Submit your government photo ID, proof of address, and, where applicable, your business license, bank statement, or credit-card statement. Check that the ID type matches the type you selected in the account. Selecting “passport” and uploading a driver’s license is a small error that reads to a reviewer as a mismatch.
4. Verify every file before you submit. Each document should be authentic, complete, legible, and unaltered, and consistent with your Seller Central profile. Read every field on the scan against the profile one last time. The slip here is submitting a screenshot or a cropped scan because it looked clear on a phone screen. Reviewers zoom in. Blurry at full size means rejected.
5. Present originals if Amazon requests a video call. Bring the original documents used at registration, not replacements you ordered afterward. Amazon compares what you hold up against what you originally filed. Showing a newer statement or a renewed license that isn’t on file can end the call without approval, even when the new document is perfectly genuine.
What I’d Do Differently From Most Sellers
Most sellers rush step 3 and skip steps 1 and 2. I’d reverse that. The upload itself takes minutes. The reconciliation before it determines whether those minutes count.
Fix the profile entry or replace the stale document before submission, not after Amazon flags it. A correction you make first looks like accuracy. The same correction after a rejection looks like a second attempt.
Say your business moved and your statement shows the new address while Seller Central still shows the old one. Don’t upload and hope. Update the record that is wrong, wait for it to reflect, then submit a set of documents that all tell the same story.
When you finish, save the submission receipt and the exact submission date. Screenshot the confirmation screen and note the case reference. That date anchors everything later, from deadline calculations to an appeal timeline, and reconstructing it from memory weeks afterward is unreliable.
Keep the submitted files in a single dated folder, exactly as sent. If Amazon asks a follow-up question, you’ll answer from the same set the reviewer saw, not from a newer version on your desktop.
Preparing for a Video or Face Verification Check
A check that takes minutes can still interrupt listings and delay access to revenue and inventory. Sellers hear “quick identity check” and prepare casually, then lose days because the wrong person, the wrong document, or a bad camera angle turned a short call into a stalled case.
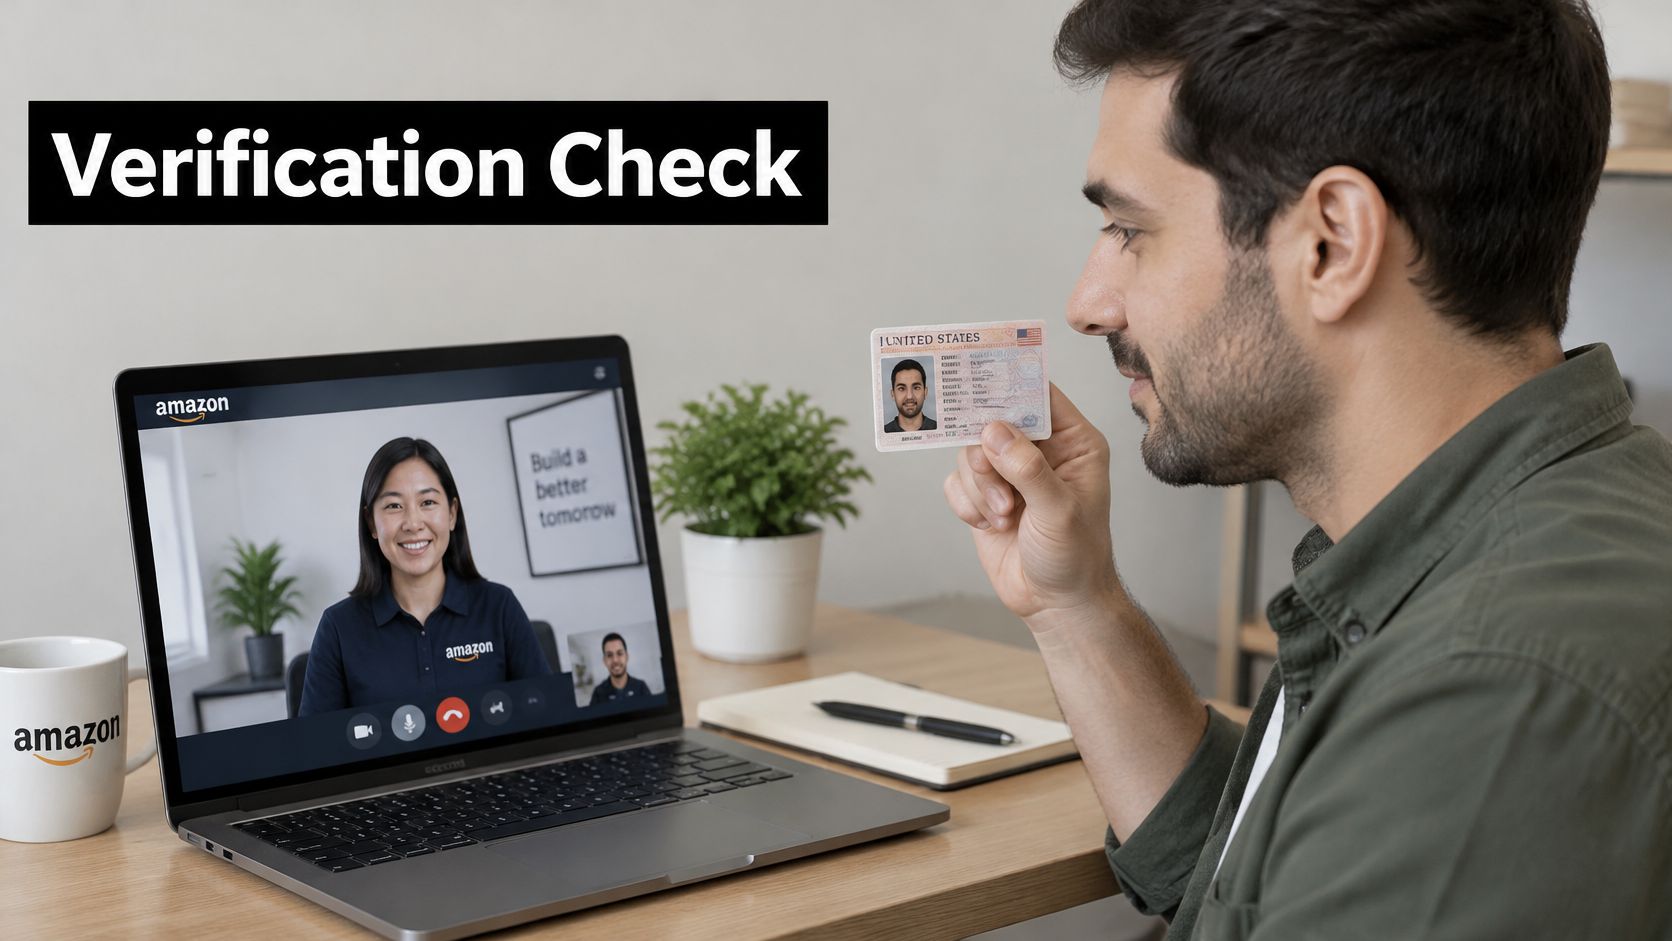
This is what the live check looks like in practice.
What Amazon Actually Runs
Enhanced checks can involve a third-party provider, facial verification, or a live video interview where the account owner or an authorized representative holds up the document on camera. One seller forum thread describing the notice gave sellers 14 days to begin the process, with the check itself running anywhere from a few minutes to about eight minutes and review taking up to 72 hours.
Prepare like it’s an audit of your registration file:
- Details matched beforehand: The name, date of birth, and address on your ID should read exactly as they appear in Seller Central. A one-letter difference can stall the call before it starts.
- Originals within reach: The ID and statement or license tied to your registration, ready to hold up clearly.
- Room and light sorted: A quiet space with even, front-facing light so your face and the document both read cleanly on camera.
- Tech tested early: A working camera, a stable connection, and the browser or app open and signed in before the slot.
The walkthrough below shows the mechanics of getting through the call itself.
Three Situations That Derail Calls
If the owner is unavailable, name an authorized representative with documented authority before the call, not during it. A representative who can’t show authority to act for the account gives Amazon a reason to stop.
If the ID is expired, replace the document before your deadline where possible. Presenting an expired ID and explaining that a renewal is in progress rarely moves a reviewer. If you have language or accessibility needs, request an accommodation in writing as soon as the notice arrives, while there’s still time in the window.
If you cannot finish within the window, file a written request for more time before it closes and keep a record of every message, timestamp, and call reference. A deadline addressed in writing is defensible. One that passes without notice is not.
Fixing Rejections and Clarification Requests
A clarification request feels like a rejection, but it isn’t one. It’s Amazon saying the evidence didn’t match, didn’t read clearly, or didn’t arrive complete. Read the symptom, find the cause, and fix that specific thing instead of resubmitting everything and hoping.
| Symptom | Likely cause | Fix |
|---|---|---|
| Request for clarification | Name or address does not match the record | Re-enter the exact legal name and address, then resubmit a matching document |
| Document rejected as unreadable | Cropped, glare or low resolution | Rescan at high resolution with all four corners visible |
| Proof of address rejected | Statement older than 180 days | Upload a new statement dated within 180 days |
| Video call ended without approval | Replacement documents shown on the call | Bring the original documents used at registration |
| Upload refused | Password-protected file or file over 50 MB | Remove the password, compress the file and save in a supported format |
| Case still pending after three business days | Open clarification request or incomplete file | Check Seller Central messages and reply within the stated deadline |
Why a Stalled Case Often Isn’t a Failed Case
Amazon’s seller guidance states that identity verification usually takes three business days or less when submitted documents meet the requirements, and cautions that additional time may be needed if it requests clarification. So a case sitting past that estimate with an open request is normal workflow, not a silent denial. Incomplete, unclear, or inconsistent documentation is what stretches the timeline.
Check your Seller Central messages before you open a new case. Duplicate cases split the reviewer’s view of your file and slow everything down. Reply inside the existing thread, within the stated deadline, with only the corrected material requested.
A Mismatch Worked Example
Say a registry extract reads “Sunrise Trading LLC” but the Seller Central profile reads “Sunrise Trading”. Amazon flags the mismatch. The tempting fix is editing the document or uploading a letter explaining that both names mean the same company. Don’t.
The correct fix is correcting the profile entry so it matches the official record, then resubmitting. Official records are the source of truth. Your profile is the copy.
Rule of thumb: Fix the record that disagrees, not the one that is correct. Editing a genuine document to match a typo turns a clerical problem into an authenticity problem.
Apply that logic everywhere. An unreadable scan needs a rescan, not a longer explanation. A refused upload needs the password removed and the file compressed into a supported format, not a different document entirely. Each symptom has one matching fix, and sending extra unrequested files gives the reviewer more fields to find fault with.
Verification Problem or Deactivation Problem
Run one final check before you respond. If the notice asks for documents or a call, you’re in verification territory and the fixes above apply. If it cites policy violations or complaints and removes your listings, that’s a deactivation case with a different response path. Confusing the two wastes your response window on the wrong remedy.
Sample Responses for Verification and Appeals
Short, dated, and specific beats long and emotional every time. A reviewer scanning your reply needs to route it, match it to a request, and confirm the problem is fixed. These three templates cover the replies sellers need most.
Template One, Document Resubmission
“Hello, I’m resubmitting documents for [exact legal business name as in the profile]. Attached are [bank statement, issued (date)] and [business license, issued (date)], submitted in response to your request dated (date).” The file names and issue dates prove the documents are current, and naming the request date ties your reply to the reviewer’s open item.
Template Two, Appeal of a Verification Decision
“Account ID: [ID]. Notice date: (date). On (date) I submitted [documents]. The reason given was [specific reason]. I’ve corrected this by [exact correction]. Please review the attached files and confirm your decision in writing.” The account ID routes the reply to the right file. Stating the stated reason and your correction shows you fixed the cause, not just resent the same evidence, and structuring it this way follows the logic of a sound Amazon plan of action template without copying one blindly.
Template Three, Request for More Time
“Account ID: [ID]. I’m requesting additional time to complete verification because [specific reason]. The required document will be issued on (date), and I’ll submit it by (date).” A concrete reason with two firm dates reads as a plan. A vague request for an extension reads as a delay, and reviewers treat them differently.
Keep every reply factual. Don’t argue about whether the request was fair, don’t attach files nobody asked for, and don’t bury the correction under background about your business. Save a copy of each message with its timestamp, in case you later need to show what was sent and when.
A reply that answers the exact request, backed by dated evidence, moves a case forward far more reliably than a long explanation. If a sentence doesn’t help the reviewer match, date, or route something, I’d cut it.
When to Bring in a Lawyer for Suspensions and Withheld Funds
To be clear again, this article is for informational purposes only, it’s not legal advice, and reading it creates no attorney-client relationship. With that said, some situations stop being paperwork problems.
Bring in counsel when your account is suspended with inventory or funds withheld beyond the timeline Amazon gave you. The same applies after corrected resubmissions keep getting rejected, when a deactivation notice cites policy or intellectual property complaints, when a deadline can’t be met, or when significant revenue is frozen. At that point the cost of another failed self-drafted appeal usually exceeds the cost of advice, and a lawyer for Amazon sellers can assess where a verification issue ends and a suspension dispute begins.
A lawyer typically reviews the notice and your submission history, builds an evidence timeline from your dated records, drafts the appeal, and works on securing release of funds. LA Law Group, APLC, founded in 2017 and based in California, handles eCommerce and Amazon law, including Amazon account reinstatement and appeals, chargebacks and disputes, and brand protection, and offers free initial consultations.
Before your first call, gather the notice, every submission with its date, and your account ID. Act before any deadline printed in the notice, not after. A complete file handed over early gives counsel something to work with while options still exist.
If Amazon has suspended your account or withheld your funds or inventory after a verification dispute, LA Law Group, APLC can review your notice and submission history, organize your evidence timeline, and pursue reinstatement and release of what Amazon is holding. Visit LA Law Group, APLC to request a free initial consultation before your next deadline passes.
Attorney Advertising. This article is general information, not legal advice, and does not create an attorney-client relationship. Prior results do not guarantee a similar outcome.